We're living in a pretty awesome time. The market for smart trainers is quickly following that of power meters, which is to say they are getting much cheaper at a very quick rate. There is a lot of competition out there now vying for your hard earned dollar, and so the question often comes up... what smart trainer is for me?
I do almost all of my riding indoors, and for MANY years I put an untold amount of miles on my trusty old Kurt Kinetic Green Machine. (The angry badger special if anyone remembers what that was.) But eventually I decided it was time to enter the world of the smart trainer, and so I had to go through that very same line of reasoning... what trainer is for me? I spent a lot of time considering it and comparing models, and in the end I chose a used Computrainer that I picked up for $400 off of a classifieds site. That is still about the going rate depending on the model and what all is included, although with Computrainer shutting down prices seem to have dropped slightly.
So, I'm going to go over my through process and explain how I came to the conclusion that the oldest smart trainer was still the one for me.
First, I wanted a system I could run a fixed gear bike on, which (at least at the time) meant either a wheel based system or the Lemond trainer (which has a fixed adapter) but since I wanted to be able to switch (quickly) between geared and fixed it really meant ONLY a wheel based system. For others direct drive might hold more appeal.
What I liked
There were two main things that in the end swayed me to choosing the Computrainer over another system, reliability and replacement parts. Those two things mean a lot to me since I like to DIY most of my projects and not rely on sending things back to the manufacturer.
I think when people talk about reliability in trainers, it's hard to argue that the Computrainer is still the benchmark, with many professional studios running units hard day in and day out for many years with little maintenance. That's not to say that some of the newer offerings aren't just as reliable, but they don't yet have the 20+ years of data that the Computrainers has to look back on. It's nice that as a whole the machine is fairly "simple" in design and all of the parts are well built meant to take a beating.
I like that the head unit controller is an easy to understand setup with no frills attached. (as you might expect) It's sort of like the old SRM units, just a couple of buttons, sturdy design, not much to draw your attention away from getting work done. The buttons don't provide quite the feedback I'd really like (sometimes you need to look to make sure you actually hit the botton) but overall everything works the way you'd expect.
While it's certainly not something unique to Computrainers, the stability of the unit is something I like as well. I'm certainly no sprinter, but occasionally I wind up for a meager 800-900w "sprint" in a zwift race or what have you, and I appreciate that a big out of the saddle move doesn't "rock" the trainer. It's a little back of the mind relief that this thing can take much higher outputs without throwing the rider off like a scorned bull that makes me willing to embarrass myself when the green jersey comes up for grabs.
And most of all I like the accuracy. After you've set your crr for the unit you can be confident that 250w today and 250w tomorrow are going to be what you're hitting. There is a great debate out there about whether accuracy is more important than inaccuracy so long as it's repeatable... but why not get it right if you can? This thing is accurate, repeatably!
What I didn't like
For all the things I did like about the Computrainer, there are some things that are not in it's favor. The biggest one is that it is a wired system. That means that ANT+, Bluetooth, and pretty much anything that will come in the future will NOT be compatible with the Computrainer, and (especially now with them being semi-defunct) it's unlikely that going forward there will be any reverse engineering to make it work (like what Zwift have done) and you aren't ever going to get it working on a phone/tablet/whatever. At current, this isn't a problem for me since I run a desktop to use all my programs, but I can see a time in the future when that becomes either cumbersome or just totally obsolete. You can use both TR and Zwift on your iPad (and Android, at least soon for Zwift) and while that's not the "norm" for most people in 2017, it might be in another year or two. That's something that will likely never work with the Computrainer.
You'd expect, as things look right now that we've hit enough of a lull in technology (both actual hardware and in programs like Zwift / TR being top of the hill right now) that you'll get a good couple more years out of the Computrainer before compatibility really starts to become an issue. Zwift and TR are the current big dogs, and both have been thoughtful enough to include compatibility with the Computrainer, if a bit crudely retrofit. Still, what's hot today is often overshadowed tomorrow, so this is a big sticking point to consider.
Speaking of negatives and software... there is the Racermate program made for your Computrainer. To say it hasn't aged well in the face of the Zwift era is, well, a huge understatement. While there are some parts of the software that are convenient (downloading a race course is simple) it's not something you can't do with the other programs (I just download the course from mapmyride and put it into Zwift)
There is also the video series... I'll admit, the first time or two you load one up it's got some novelty to it, but really, of the stack of videos I got with my Computrainer I've watched/ridden each of them once or twice, and now they are laying in a forgotten CD protector book with my Weezer albums.
Another negative towards the Computrainer is sustained climbing/big gear work. Since you cool the load generator by spinning it, once you slow your cadence down you start heating things up. Eventually you run the risk of burning up the unit... although the tyre might give up before then. For most people this will never be an issue, but it's something to consider if you were planning some epic Everesting challenge.
While I did list reliability and ease of getting replacement parts as a positive, it's also worth noting that it's possible that will change in the coming years. While finding a DIN cable or Audio cable will never be an issue, I could imagine a time where needing a new power strip or load generator might become more difficult. It's also worth noting that while Racermate does sell all the essential parts for the Computrainer as of now, they aren't cheap. $375 for the Handlebar controller, no matter how sturdy it is is fairly laughable. (*as of Nov 17 both the Controller and Load Generator are on backorder... maybe something to consider as well.)
Working with Zwift
Zwift is sort of the shared king of indoor training / entertainment (TR is less so entertainment) and very likely something you've at least considered if you're looking at a smart trainer. The good news is that the Computrainer does indeed work with Zwift... the bad news is that it's not without some hiccups.
Obviously, it needs to be wired into your computer. I think everyone is aware of that, so I won't belabor the point. No iPad/Android Zwifting.
Otherwise, the biggest annoyance is the calibration. The Computrainer needs a couple of minutes at a warmup pace for the tyre to get heated up enough for a stable pressure/crr reading. (I know, in theory if you got the pressure exactly right on the rear tyre with the same air pressure every time it'd be ok, but that's not real life.) Once everything is warmed up and get consistent readings when you check the crr then your Computrainer is ready to go and accurate. Unfortunately, Zwift doesn't have a way to do this calibration In-Game. Once your Computrainer is connected to Zwift, you lose any use of your handlebar controller, including setting the crr. Unfortunately, that means you are going to be spending the first 10-15 minutes of every ride you do off of Zwift, calibrating, then loading up the program. Some creative folks have tried things like yanking the cord from the computer, setting crr, then plugging it back up... but in my own experience/testing Zwift would never recognize the Computrainer again without re starting the program, at which point you might has well just wait and do it right. I wouldn't look for this feature to be implemented in the future either... it seems like if an in-game calibration was going to be added, it would have made it's way in around the time Beta ended. As mentioned above, it's unlikely much thought is given to a "dead" smart trainer any longer.
That said, once you are up and running things are great. The Computrainer response in ERG mode is fast and, well... it's a Computrainer. They didn't get everything right, but the things they got right, they REALLY got right, and the ride quality is one of those things. Outside ERG mode (in "riders choice") you have some crude resistance up/down controls and the things works like a slightly smarter dumb trainer.
Final Thoughts
The Computrainer is in an odd spot right now, and that makes it tough to recommend to the average person... certainly it's built like a tank, but how many of us are sending .50 shots at our smart trainer? It does pretty much everything you need it to do, but it (likely) won't do the things you will want it to do in a couple of years. They don't often break, but if a key part does break, how long will you be able to get parts for it? It's accurate, but it's not high tech. These are things that's the average person really has to weigh against how much they are willing to pay for "the nicest old house in the neighborhood." At present, I think $500 for a nice model with some extra's is about where I draw the line. Anything more than that and the competition is just too steep. Below that and you are in what i think of as "deal" territory. Sure there are other smart trainers in that price range, but nothing quite of the same build quality and reliability.
So at the end of the day, I think it's a good option for folks who have their eyes open going in and don't mind waiting for the right deal. I love mine, and hope I can get another 5 years or so at least out of it before I even start having to think about "upgrading." We will see!
I will be in Germany for the next couple of weeks. It's unlikely I will get any meaningful blogging done in that time, or the immediate future when I get back to work/real life. I will have another post up before Christmas for sure though! Have a great Thanksgiving everyone!
- Christopher Morelock
Showing posts with label review. Show all posts
Thursday, November 16, 2017
Wednesday, April 12, 2017
Review: Giro Aerohead MIPS
The Arrowhead Aerohat Aerohead. Few Helmets are as striking, and very rarely do they come with such high praise before release. It's no secret that I have a thing for aero lids and an almost sickness for looking for just a couple more "free" watts here and there... so when I read Jim Manton (ERO) had tested it better on everyone he put it on, I paid attention.
The danger of claims like that (as you should know if you are a follower of this blog) is that blanket statements like that are dangerous. It's certainly NOT the best helmet for EVERYONE. We are all too different, if only slightly. But that said, it is certainly in contention for the most consistently good helmet offered right now. I've seen nobody (again, dangerous terminology) test it that it wasn't in the top3 best helmets they put on.
So, let's talk about it... there's more to a helmet than being fast, right?
The Good
The good news is that there is a lot to like about this helmet. For me personally (and for many of you as well) the start and end of pretty much everything dealing with a helmet will be whether or not it's fast. In that regard I would guess it will be tough (not impossible) to beat. In my own n=1 example I tested most of the "fast" helmets against it at A2. In the end, the Aerohead was a clear winner (size medium, beating the next closest, a size small Specialized TT04, by a couple of watts) with the only questions left out there (currently) being either the eye wateringly priced Aerohead Ultimate, the astronomically priced Crux (Team GB 2012) helmet or the not yet released Kask helmet we saw on Froome at the end of last year. (A longer tailed Bambino, close to the Crux design)
Of course that is only for me... As I alluded to above, some very smart guys (including Jim at Ero and Brian / Heath from Aerocamp) pretty much agree that the Aerohead tests "very well" on most everyone. I wrote not too many weeks ago about the importance of doing your own testing, but also mentioned that if you were unwilling/able to do your own testing, a good fall back is to pick something that does well on a wide variety of people. In the case of helmets, I think the Aerohead is high on that list, if not at the top.
Whether you believe MIPS technology is a huge step forward or just a fancy acronym, I can't think of any reasons not to at least be lukewarm to the fact that it's included in the helmet design.
Many helmets use magnets to attach the visor, but Giro really got it right. The magnets they use are powerful and locked in place. "Finding" the right spot for the visor (both down or flipped up) to sit is very easy, as a corner quickly locks and then pulls the rest in place. After dealing with snap on visors or (even worse) the old glued on magnets, it's refreshing to find one that just works without a bunch of hassle.
Another thing that's pretty nice is the price. At $250, it sits as the cheapest buy in the "superhelmet" category, slightly cheaper than other good options like the POC or Specialized. It's not a big price drop, but considering what they could have priced this helmet it's refreshing not to just be getting heavily price gouged.
The Bad
The visor, despite being well thought out, is not really an optional piece of equipment with the Aerohead. Sure, you can pull the Taylor Phinney and ditch it, but at that point you're better off wearing another helmet. So despite it seeming pretty nice to be able to remove it quickly, you really won't be. The exception to this is in the case that the visor fogs up. I wipe down my visors with anti-fog as a precaution, but in the even that it happens it's not nearly so catastrophic as it would be in a lot of helmets with visors, where you simply have to choose no visibility or ditching the visor and hoping to pick it up later. Still, that's not ideal.
Another negative rolls back around to pricing. Sure, Giro cut a few bucks off the price, but they also don't give you much in the way of accessories. Most of the other aero helmets come with a carrying bag (or even a hard shell in some cases) and at least a clear visor to swap to. The Aerohead comes with some extra padding and that's it. The Ultimate does include a hard shell and clear visor, but at double the price. Supposedly both are going to be made available for purchase separately, but so far I haven't seen either listed on Giro's website. (This could be because of the visor redesign, see below)
Heat and Weight aren't things that I normally factor in much to my helmet purchases, but if you do, then both segments are likely negatives. The helmet is fairly heavy (the heaviest aero lid I have just by my rudimentary "pick up" test.) which is somewhat surprising since a lot of the "helmet" is really the visor. I guess in most other helmets that space the visor fills up is really nothing more than a plastic fairing... As far as getting hot... I personally don't think it's anything especially warm, but I've seen that cited multiple times in different people's opinion of the helmet, so it's worth mentioning if you're prone to overheat.
The Ugly
Besides the helmet itself? (It is a... "striking" design)
Giro has had a couple of hiccups with the helmet. The original release (check your date) had a lot of complaints about the visor digging sharply into some folks cheeks. That (I'm guessing) has delayed some of the optional pieces being released (like the different tint visors) as Giro has had to re-work the visor for the next batch. To their credit they will send you the (slightly) adjusted visor if your date matches up free of charge.
Fogging is the other issue that can get ugly. You can find endless discussions and recommendations about prevention online, and mostly I've found the "common" ones to work pretty well, but not flawlessly. Sometimes it seems like it's inevitable. That's definitely something to consider. The other (current as of 4/12/17) issue is the lack of visor options. The dark lens is great on sunny days, but is pretty lacking in overcast/rainy days and also indoors or at night. This is a problem that is likely soon to be solved, but as of today it's not.
Final Thoughts
If you're just going to be guessing what helmet is best, I think the Aerohead is a very safe bet. The wrap around visor gives a nice full view and the MIPS *could* help save your noggin. There's a lot to like in the Aerohead's rebirth (Lemond was using the original in '89) so I'd say it should definitely be on your radar. As always with anything aero, it would be best to test it yourself, but if not... it's a smart guess.
Thanks for reading! I really appreciate it.
-Christopher Morelock
![]() |
| Rohan has set some impressive times in the Aerohead (and not in it as well) |
The danger of claims like that (as you should know if you are a follower of this blog) is that blanket statements like that are dangerous. It's certainly NOT the best helmet for EVERYONE. We are all too different, if only slightly. But that said, it is certainly in contention for the most consistently good helmet offered right now. I've seen nobody (again, dangerous terminology) test it that it wasn't in the top3 best helmets they put on.
So, let's talk about it... there's more to a helmet than being fast, right?
The Good
The good news is that there is a lot to like about this helmet. For me personally (and for many of you as well) the start and end of pretty much everything dealing with a helmet will be whether or not it's fast. In that regard I would guess it will be tough (not impossible) to beat. In my own n=1 example I tested most of the "fast" helmets against it at A2. In the end, the Aerohead was a clear winner (size medium, beating the next closest, a size small Specialized TT04, by a couple of watts) with the only questions left out there (currently) being either the eye wateringly priced Aerohead Ultimate, the astronomically priced Crux (Team GB 2012) helmet or the not yet released Kask helmet we saw on Froome at the end of last year. (A longer tailed Bambino, close to the Crux design)
Of course that is only for me... As I alluded to above, some very smart guys (including Jim at Ero and Brian / Heath from Aerocamp) pretty much agree that the Aerohead tests "very well" on most everyone. I wrote not too many weeks ago about the importance of doing your own testing, but also mentioned that if you were unwilling/able to do your own testing, a good fall back is to pick something that does well on a wide variety of people. In the case of helmets, I think the Aerohead is high on that list, if not at the top.
Whether you believe MIPS technology is a huge step forward or just a fancy acronym, I can't think of any reasons not to at least be lukewarm to the fact that it's included in the helmet design.
Many helmets use magnets to attach the visor, but Giro really got it right. The magnets they use are powerful and locked in place. "Finding" the right spot for the visor (both down or flipped up) to sit is very easy, as a corner quickly locks and then pulls the rest in place. After dealing with snap on visors or (even worse) the old glued on magnets, it's refreshing to find one that just works without a bunch of hassle.
![]() |
| snapped up |
![]() |
| normal position note the long powerful magnets |
Another thing that's pretty nice is the price. At $250, it sits as the cheapest buy in the "superhelmet" category, slightly cheaper than other good options like the POC or Specialized. It's not a big price drop, but considering what they could have priced this helmet it's refreshing not to just be getting heavily price gouged.
The Bad
The visor, despite being well thought out, is not really an optional piece of equipment with the Aerohead. Sure, you can pull the Taylor Phinney and ditch it, but at that point you're better off wearing another helmet. So despite it seeming pretty nice to be able to remove it quickly, you really won't be. The exception to this is in the case that the visor fogs up. I wipe down my visors with anti-fog as a precaution, but in the even that it happens it's not nearly so catastrophic as it would be in a lot of helmets with visors, where you simply have to choose no visibility or ditching the visor and hoping to pick it up later. Still, that's not ideal.
![]() |
| Phinney seemingly ditched his visor (from fogging up likely) halfway at the 2016 US Nats. |
Another negative rolls back around to pricing. Sure, Giro cut a few bucks off the price, but they also don't give you much in the way of accessories. Most of the other aero helmets come with a carrying bag (or even a hard shell in some cases) and at least a clear visor to swap to. The Aerohead comes with some extra padding and that's it. The Ultimate does include a hard shell and clear visor, but at double the price. Supposedly both are going to be made available for purchase separately, but so far I haven't seen either listed on Giro's website. (This could be because of the visor redesign, see below)
![]() |
| Using my old selector bag to transport the Aerohead... not ideal with the visor |
Heat and Weight aren't things that I normally factor in much to my helmet purchases, but if you do, then both segments are likely negatives. The helmet is fairly heavy (the heaviest aero lid I have just by my rudimentary "pick up" test.) which is somewhat surprising since a lot of the "helmet" is really the visor. I guess in most other helmets that space the visor fills up is really nothing more than a plastic fairing... As far as getting hot... I personally don't think it's anything especially warm, but I've seen that cited multiple times in different people's opinion of the helmet, so it's worth mentioning if you're prone to overheat.
The Ugly
Besides the helmet itself? (It is a... "striking" design)
Giro has had a couple of hiccups with the helmet. The original release (check your date) had a lot of complaints about the visor digging sharply into some folks cheeks. That (I'm guessing) has delayed some of the optional pieces being released (like the different tint visors) as Giro has had to re-work the visor for the next batch. To their credit they will send you the (slightly) adjusted visor if your date matches up free of charge.
Fogging is the other issue that can get ugly. You can find endless discussions and recommendations about prevention online, and mostly I've found the "common" ones to work pretty well, but not flawlessly. Sometimes it seems like it's inevitable. That's definitely something to consider. The other (current as of 4/12/17) issue is the lack of visor options. The dark lens is great on sunny days, but is pretty lacking in overcast/rainy days and also indoors or at night. This is a problem that is likely soon to be solved, but as of today it's not.
Final Thoughts
If you're just going to be guessing what helmet is best, I think the Aerohead is a very safe bet. The wrap around visor gives a nice full view and the MIPS *could* help save your noggin. There's a lot to like in the Aerohead's rebirth (Lemond was using the original in '89) so I'd say it should definitely be on your radar. As always with anything aero, it would be best to test it yourself, but if not... it's a smart guess.
Thanks for reading! I really appreciate it.
-Christopher Morelock
Wednesday, January 25, 2017
Review: Bike Trainer Tape
First let's take care of the full disclaimer: I was sent this tape to try out and review at no cost to myself. It does not reflect (positively or negatively) in this, or any of my reviews, but some folks get hung up on things like that and so I like to put the info out there.
A couple of weeks ago I was sent a new product to put through it's paces, Bike Trainer Tape. (You can also find their Facebook page here and amazon store here.)
So, let me give you the short and quick thoughts on it first, then we'll delve into a little more thorough thoughts on it.
After going through almost all of my roll (I still have enough left for one race) I will say that if you fit the target audience, it's a pretty nice, life simplifying product. There are plenty of people who absolutely loathe switching tires to go between riding outdoors and indoors, and for them, I'd say it can certainly save you some headaches. There are also the racers that don't like warming up on a $100+ race tire (myself included) that the tape can certainly be a benefit to.
My goal from the outset was to put the tape through the absolute hardest (not recommended even) conditions to see where (and why) the point of failure was. Anyone who knows me knows I spend a VERY large portion of my training time on a trainer of some sort, so it's certainly worth prefacing with the fact that I was almost certainly tougher on it than the vast majority will be.
Anyways, lets' get to it.
The Good
I am in a very fortunate position when it comes to my indoor trainer / outdoors riding. I have a stable of bikes and multiple power meters... so it's no great cost to me to have a nearly 100% dedicated indoor powertap wheel with a trainer tire on it. That isn't the case for most people, and so to BTT's primary audience it can be a boon. I would hazard to guess that the majority of folks split their time indoors and outdoors either pretty evenly or slight to moderately favoring the great outdoors. If you are using a traditional turbo trainer, that either means you swap tires when you hop on the turbo, or you just accept the added wear that riding the turbo will do to your tires. While there are certainly other solutions to the problem (changing tire, direct drive trainer, dedicated trainer tire/wheel) BTT is certainly the cheapest and quickest to take you from outdoors to indoors ready. Installing the tape takes about thirty seconds, maybe slightly longer your first time or two. (or if you double wrap it)
The things I found that were most important when installing it are to get it at the "sweet spot" of tension as you wrap it around the tire. You don't want it to be pulled so tight that is starts to stretch, but you do want to make sure it is securely around the tire so that you reduce the risk of it bunching up when you put pressure on it. Once you've got it fully around (slightly overlapping at the end) you run around it again and get rid of any air bubbles that may have formed. Then you are ready to go as usual.
The other group of folks (that I lump myself in with) that could use the tape are cyclists looking for a way to protect their expensive race tires when doing a warmup before the start. I carry my old Kurt Kinetic Road Machine with me to all my TT's, and I've always kind of just had to cringe and bear it when I clamped the pressure down on my $100 Turbo Cotton or Veloflex Record. You could also swap wheels to warm up, but that opens up some situations (especially with superbikes or those with horizontal dropouts) where user error (whether because of lining up the wheel or the hard to adjust brakes on superbikes) can lead to at the least a much more hectic race to the start line. I don't know many of my friends that race a lot that would remove their rear wheel of their tt bike minutes before their start time.
To try this out I did my full TT warmup using my race gear. (Speed Concept, Zipp 404 Powertap, Spec Turbo Cotton 24 w/ latex, KK Road Machine with a little over a billion miles on it) I set the pressure on the rear tire of my KK by the "slip test" (hold the flywheel and pull up on the wheel. Tighten right to the point where the tire no longer slips)
The warmup itself I'll spare you from having to read. It involves a couple minutes easy spinning, a few efforts at tempo, a build up to slightly above race pace and a couple of "leg openers" going up to a few short "not quite sprints." The wattage range went from ~150w to upwards of 600.
I double wrapped my tire for the warmup (just like I would/will on race day) because I wanted to make sure I got all of the Turbo Cotton that would be touching the roller protected.
After the 30 minute "warmup/test" was over I hopped off and removed the tape.
There was a very slight bit of residue left over when I removed the tape. I was able to get it off with just my sweat towel and water with minimal effort, but I think it'd be prudent (and BTT recommends) using alcohol to wipe it down to make sure you get all of the residue off. I'd say it might take you 1 to maybe 2 minutes to get it totally clean after you jump off the bike.
The Bad
Another preface - BTT has a specific caution against using the tape with a computrainer OR with a trainer tire, both of which I'm about to talk about doing. So take most of "the bad" with a grain of salt that I'm going against manufacturer recommendations.
Unfortunately (for me particularly) I could not get the tape to work with my Computrainer, nearly at all. I tried multiple tires, different amounts of press on force, pretty much everything I could think of and it always either bunched up or pushed off of the side of the tire within the first few minutes (generally before I got to the point of setting the rolling resistance)
My theory is that the Computrainer uses a mounting bracket for the resistance unit that allows for quite a lot of adjustment, both fore and aft and also side to side. Unfortunately this opens up the possibility to get the roller slightly off center/angled. Racermate's way to check is to roll the tire forwards and backwards and watch for the tire to move side to side on the roller... and while I've got my unit nailed down to where it is no longer noticeable, I would guess that it is still a couple of degrees away from perfectly even. That seems to be just enough to push the tape off the side of the tire. Double wrapping did not help. I would also guess that since ERG mode (on all smart trainers like the Computrainer) adjusts the resistance in ways other than you actually shifting gears, that you would heat up the tape quite quickly (which I don't think I need to tell you is not good) and probably have similar or other mixed results. Unfortunately I do not have another Smart trainer to test this out, so that's only speculation. (And BTT does not have any warning against using it with other smart trainers)
I *did* try the tape with my Tacx trainer tire on the Kurt Kinetic as well (again, using a trainer tire is not recommended by BTT) and although it did not work (it actually bunched up, I should have gotten a picture but didn't, sorry.) with a single wrap, it did stay on and work as advertised with a double wrap. Now, why you would use BTT on a trainer specific tire... I don't know... but I tried it anyways just out of curiosity, so it *can* work.
The Ugly
BTT currently sells for ~$13 a roll. Each roll is good for (I actually got a little more than the advertised amount out of my roll) 10 tape jobs, 5 if you double wrap. Now, considering a single wrap is estimated to give you 40-80hours of ride time (I'm afraid I did not put the longevity to the test, but it does seem reasonable) then for the most likely "target" audience that is considerably cheaper than buying a trainer specific tire, even if you swap between road and turbo a bit. However, the cost does start to climb if you are going indoor to outdoor frequently, as the tape is done once you pull it off. (I tried to re-use a strip and it did not work at all)
That means that the other target group, the warming up cyclists, will burn through a roll of the tape pretty quickly. If, like me, you are going to double wrap your tire, you're looking at $2.60 in tape each time you warm up before a race. Is that more or less than you'll chew off of a race tire in around 30 minutes of warming up? I'm not sure (and it likely depends on your setup) but I'd guess it's somewhere in the ball park. Is that couple of dollars worth not having to deal with swapping out your race and trainer wheel to warm up? Again, depends on the person, but I'd guess that in general it is.
BTT contacted me and let me know that there will be upcoming promotions aimed towards time trialists to help ensure they get a good bang for their buck. I will update when we have more information.
Oh, and only orange? C'mon guys... we need a variety of colors to coordinate with our kit ;)
Final Thoughts
BTT is certainly a quality of life item, not an essential one, but like central heat and air or smart phones... there's nothing wrong with quality of life items. There are definitely those out there who it will work better for than others, but if you are the type of rider who pretty much stops riding outdoors as soon as the weather turns cold, or are somewhat apathetic when it comes to changing tires between the great outdoors and the turbo (be honest...) then BTT can be a nice middle ground. Same for the racers looking to protect their high thread count rubber before start time.
So, if it sounds like BTT might be for you, I say give it a go. While it won't be something I use a a regular basis, I will definitely have a roll in my travel bag ready to use before my races.
As always, thanks so much for reading, I really appreciate it!
- Christopher Morelock
A couple of weeks ago I was sent a new product to put through it's paces, Bike Trainer Tape. (You can also find their Facebook page here and amazon store here.)
So, let me give you the short and quick thoughts on it first, then we'll delve into a little more thorough thoughts on it.
After going through almost all of my roll (I still have enough left for one race) I will say that if you fit the target audience, it's a pretty nice, life simplifying product. There are plenty of people who absolutely loathe switching tires to go between riding outdoors and indoors, and for them, I'd say it can certainly save you some headaches. There are also the racers that don't like warming up on a $100+ race tire (myself included) that the tape can certainly be a benefit to.
My goal from the outset was to put the tape through the absolute hardest (not recommended even) conditions to see where (and why) the point of failure was. Anyone who knows me knows I spend a VERY large portion of my training time on a trainer of some sort, so it's certainly worth prefacing with the fact that I was almost certainly tougher on it than the vast majority will be.
Anyways, lets' get to it.
The Good
I am in a very fortunate position when it comes to my indoor trainer / outdoors riding. I have a stable of bikes and multiple power meters... so it's no great cost to me to have a nearly 100% dedicated indoor powertap wheel with a trainer tire on it. That isn't the case for most people, and so to BTT's primary audience it can be a boon. I would hazard to guess that the majority of folks split their time indoors and outdoors either pretty evenly or slight to moderately favoring the great outdoors. If you are using a traditional turbo trainer, that either means you swap tires when you hop on the turbo, or you just accept the added wear that riding the turbo will do to your tires. While there are certainly other solutions to the problem (changing tire, direct drive trainer, dedicated trainer tire/wheel) BTT is certainly the cheapest and quickest to take you from outdoors to indoors ready. Installing the tape takes about thirty seconds, maybe slightly longer your first time or two. (or if you double wrap it)
The things I found that were most important when installing it are to get it at the "sweet spot" of tension as you wrap it around the tire. You don't want it to be pulled so tight that is starts to stretch, but you do want to make sure it is securely around the tire so that you reduce the risk of it bunching up when you put pressure on it. Once you've got it fully around (slightly overlapping at the end) you run around it again and get rid of any air bubbles that may have formed. Then you are ready to go as usual.
The other group of folks (that I lump myself in with) that could use the tape are cyclists looking for a way to protect their expensive race tires when doing a warmup before the start. I carry my old Kurt Kinetic Road Machine with me to all my TT's, and I've always kind of just had to cringe and bear it when I clamped the pressure down on my $100 Turbo Cotton or Veloflex Record. You could also swap wheels to warm up, but that opens up some situations (especially with superbikes or those with horizontal dropouts) where user error (whether because of lining up the wheel or the hard to adjust brakes on superbikes) can lead to at the least a much more hectic race to the start line. I don't know many of my friends that race a lot that would remove their rear wheel of their tt bike minutes before their start time.
To try this out I did my full TT warmup using my race gear. (Speed Concept, Zipp 404 Powertap, Spec Turbo Cotton 24 w/ latex, KK Road Machine with a little over a billion miles on it) I set the pressure on the rear tire of my KK by the "slip test" (hold the flywheel and pull up on the wheel. Tighten right to the point where the tire no longer slips)
The warmup itself I'll spare you from having to read. It involves a couple minutes easy spinning, a few efforts at tempo, a build up to slightly above race pace and a couple of "leg openers" going up to a few short "not quite sprints." The wattage range went from ~150w to upwards of 600.
I double wrapped my tire for the warmup (just like I would/will on race day) because I wanted to make sure I got all of the Turbo Cotton that would be touching the roller protected.
After the 30 minute "warmup/test" was over I hopped off and removed the tape.
There was a very slight bit of residue left over when I removed the tape. I was able to get it off with just my sweat towel and water with minimal effort, but I think it'd be prudent (and BTT recommends) using alcohol to wipe it down to make sure you get all of the residue off. I'd say it might take you 1 to maybe 2 minutes to get it totally clean after you jump off the bike.
The Bad
Another preface - BTT has a specific caution against using the tape with a computrainer OR with a trainer tire, both of which I'm about to talk about doing. So take most of "the bad" with a grain of salt that I'm going against manufacturer recommendations.
Unfortunately (for me particularly) I could not get the tape to work with my Computrainer, nearly at all. I tried multiple tires, different amounts of press on force, pretty much everything I could think of and it always either bunched up or pushed off of the side of the tire within the first few minutes (generally before I got to the point of setting the rolling resistance)
![]() |
| a whole load of things not to use with BTT in one picture! |
My theory is that the Computrainer uses a mounting bracket for the resistance unit that allows for quite a lot of adjustment, both fore and aft and also side to side. Unfortunately this opens up the possibility to get the roller slightly off center/angled. Racermate's way to check is to roll the tire forwards and backwards and watch for the tire to move side to side on the roller... and while I've got my unit nailed down to where it is no longer noticeable, I would guess that it is still a couple of degrees away from perfectly even. That seems to be just enough to push the tape off the side of the tire. Double wrapping did not help. I would also guess that since ERG mode (on all smart trainers like the Computrainer) adjusts the resistance in ways other than you actually shifting gears, that you would heat up the tape quite quickly (which I don't think I need to tell you is not good) and probably have similar or other mixed results. Unfortunately I do not have another Smart trainer to test this out, so that's only speculation. (And BTT does not have any warning against using it with other smart trainers)
![]() |
| computrainer resistance unit bracket, you can see the large hole in the middle that allows for adjustment/tuning. |
I *did* try the tape with my Tacx trainer tire on the Kurt Kinetic as well (again, using a trainer tire is not recommended by BTT) and although it did not work (it actually bunched up, I should have gotten a picture but didn't, sorry.) with a single wrap, it did stay on and work as advertised with a double wrap. Now, why you would use BTT on a trainer specific tire... I don't know... but I tried it anyways just out of curiosity, so it *can* work.
The Ugly
BTT currently sells for ~$13 a roll. Each roll is good for (I actually got a little more than the advertised amount out of my roll) 10 tape jobs, 5 if you double wrap. Now, considering a single wrap is estimated to give you 40-80hours of ride time (I'm afraid I did not put the longevity to the test, but it does seem reasonable) then for the most likely "target" audience that is considerably cheaper than buying a trainer specific tire, even if you swap between road and turbo a bit. However, the cost does start to climb if you are going indoor to outdoor frequently, as the tape is done once you pull it off. (I tried to re-use a strip and it did not work at all)
That means that the other target group, the warming up cyclists, will burn through a roll of the tape pretty quickly. If, like me, you are going to double wrap your tire, you're looking at $2.60 in tape each time you warm up before a race. Is that more or less than you'll chew off of a race tire in around 30 minutes of warming up? I'm not sure (and it likely depends on your setup) but I'd guess it's somewhere in the ball park. Is that couple of dollars worth not having to deal with swapping out your race and trainer wheel to warm up? Again, depends on the person, but I'd guess that in general it is.
BTT contacted me and let me know that there will be upcoming promotions aimed towards time trialists to help ensure they get a good bang for their buck. I will update when we have more information.
Oh, and only orange? C'mon guys... we need a variety of colors to coordinate with our kit ;)
Final Thoughts
BTT is certainly a quality of life item, not an essential one, but like central heat and air or smart phones... there's nothing wrong with quality of life items. There are definitely those out there who it will work better for than others, but if you are the type of rider who pretty much stops riding outdoors as soon as the weather turns cold, or are somewhat apathetic when it comes to changing tires between the great outdoors and the turbo (be honest...) then BTT can be a nice middle ground. Same for the racers looking to protect their high thread count rubber before start time.
So, if it sounds like BTT might be for you, I say give it a go. While it won't be something I use a a regular basis, I will definitely have a roll in my travel bag ready to use before my races.
As always, thanks so much for reading, I really appreciate it!
- Christopher Morelock
Wednesday, January 11, 2017
Quick gear Review: New Microshift Brifters
I've been riding Microshift White 10spd for about 5 years now (wow... really) and from what little bit of keeping up with the traffic on my site tells me, you guys are interested in it. (and have continued to be) My original review of the White groupset is consistently one of the most viewed posts I've ever written.
When I bought the White set it was largely a budget concern. I had just built a new road bike and didn't have tons of disposable income to throw at it. If I'm honest with myself, I had planned to upgrade to 7800 / 7900 Dura Ace pretty quickly at the time. But surprisingly, I quickly grew fond of the Microshift look and feel. Other projects took the front seat, and honestly, I just didn't feel much need to spend the money on an upgrade for something that was working fine.
Fast forward to the end of 2016. I was killing time on ebay looking at bike parts (as I'm wont to do pretty much daily) when I ran across some of the updated Arsis 10 speed brifters. They are actually fairly rare since Microshift released them around the same time as everyone (them included) made the jump to 11 speed. I had the itch to try something new, and for a while now I had been looking to put the shifter cables under the bar tape, so perfect opportunity!
The re-design of the brifters is pretty significant. The original White series brifters (and the entire range at the time) was something pretty closely related to Shimano Sora (at least in terms of actuation) but the newer design instead "borrows" heavily from Campagnolo Ergoshift, most notably with the thumb shifters as opposed to "just" levers, but also in the shape as a whole of the brifter. There is also a bit of SRAM in the texture of the rubber shifter covers. It's pretty evident that Microshift did some cherry picking for the things they liked from the big 3.
So, how have the new brifters been doing?
Well, let's take a look back at some of the complaints I had about the original "White" brifters. From the aesthetic side of things, having the cables hidden under the bar tape makes everything look MUCH cleaner, I don't think anyone will ever complain that hidden cables look worse. Since my very narrow (36cm) drop bars aren't internally routed, it does mean that I have added some width to the bars under the tape, which isn't a disaster but also not ideal. I will also, probably until the end of time, argue that shifting is not as crisp with the cables under the tape as it is when they exit the side... I thought the same thing when 7900 Dura Ace came out... but I admit that after a couple of rides I'm not sure I notice any more or if the old curmudgeon in my mind just tells me I notice. Shifting is nonetheless crisp enough to not be able to be upset with it.
There is still no adjustment for reach to the paddle, something I wish they had "borrowed" from SRAM. That was a fairly big complaint (for me) on the White set, and it's still something I'd be happy to have. It is slightly less of an issue on the updated shifters though, as the thumb triggers are (obviously) considerably closer. Since what (I) really wanted from shorter reach was an easier time shifting to a harder gear in the back while in the drops, it is a compromise that was an overall win for me.
Speaking of which, my main gripe was that shifting in the drops was very hard with the White brifters. The new design does a relatively good job of addressing that problem, and while it's still a good ways away from the "ideal" setup (sprint blips for electric shifting obviously being the best solution) it is good enough that I can actually shift down to a bigger gear from the drops. So a big step in the right direction in my opinion.
Overall, you could do a lot worse in a set of brifters. They look nice and clean, work well and won't break the bank if you crash out on them. Perfect crit gear.
Thanks so much for reading! I really appreciate it!
- Christopher Morelock
When I bought the White set it was largely a budget concern. I had just built a new road bike and didn't have tons of disposable income to throw at it. If I'm honest with myself, I had planned to upgrade to 7800 / 7900 Dura Ace pretty quickly at the time. But surprisingly, I quickly grew fond of the Microshift look and feel. Other projects took the front seat, and honestly, I just didn't feel much need to spend the money on an upgrade for something that was working fine.
Fast forward to the end of 2016. I was killing time on ebay looking at bike parts (as I'm wont to do pretty much daily) when I ran across some of the updated Arsis 10 speed brifters. They are actually fairly rare since Microshift released them around the same time as everyone (them included) made the jump to 11 speed. I had the itch to try something new, and for a while now I had been looking to put the shifter cables under the bar tape, so perfect opportunity!
![]() |
| The first sighting (of the 11 speed) at the Taipei show a few years ago. |
The re-design of the brifters is pretty significant. The original White series brifters (and the entire range at the time) was something pretty closely related to Shimano Sora (at least in terms of actuation) but the newer design instead "borrows" heavily from Campagnolo Ergoshift, most notably with the thumb shifters as opposed to "just" levers, but also in the shape as a whole of the brifter. There is also a bit of SRAM in the texture of the rubber shifter covers. It's pretty evident that Microshift did some cherry picking for the things they liked from the big 3.
![]() |
| Also, still that ancient Nashbar brake ;) |
| A good view of the textured grip, as well as the actuation of the shifters. |
So, how have the new brifters been doing?
Well, let's take a look back at some of the complaints I had about the original "White" brifters. From the aesthetic side of things, having the cables hidden under the bar tape makes everything look MUCH cleaner, I don't think anyone will ever complain that hidden cables look worse. Since my very narrow (36cm) drop bars aren't internally routed, it does mean that I have added some width to the bars under the tape, which isn't a disaster but also not ideal. I will also, probably until the end of time, argue that shifting is not as crisp with the cables under the tape as it is when they exit the side... I thought the same thing when 7900 Dura Ace came out... but I admit that after a couple of rides I'm not sure I notice any more or if the old curmudgeon in my mind just tells me I notice. Shifting is nonetheless crisp enough to not be able to be upset with it.
There is still no adjustment for reach to the paddle, something I wish they had "borrowed" from SRAM. That was a fairly big complaint (for me) on the White set, and it's still something I'd be happy to have. It is slightly less of an issue on the updated shifters though, as the thumb triggers are (obviously) considerably closer. Since what (I) really wanted from shorter reach was an easier time shifting to a harder gear in the back while in the drops, it is a compromise that was an overall win for me.
![]() |
| Reaching (half) the shifter on the Arsis brifters is possible from most positions in the drops |
| Trying to get to the shifter on the White brifters was something I basically had to give up on. |
Speaking of which, my main gripe was that shifting in the drops was very hard with the White brifters. The new design does a relatively good job of addressing that problem, and while it's still a good ways away from the "ideal" setup (sprint blips for electric shifting obviously being the best solution) it is good enough that I can actually shift down to a bigger gear from the drops. So a big step in the right direction in my opinion.
Overall, you could do a lot worse in a set of brifters. They look nice and clean, work well and won't break the bank if you crash out on them. Perfect crit gear.
Thanks so much for reading! I really appreciate it!
- Christopher Morelock
Wednesday, December 7, 2016
REVIEW: Silca T-Ratchet & Ti-Torque Kit
It seems like all I'm having a chance to review lately is Silca's line of products. And I'm happy with that, because they appeal to both the practical side of me, and the gear snob. As it should be.
Anyways, let's dig right in.
The T-Ratchet and Ti-Torque were a Kickstarter project (eventually reaching over 1200%) I became aware of shortly after it was announced. I'm not much of a Kickstarter kind of guy honestly, but I felt like this was a tool that should exist, and Silca has a big enough name behind it that I felt pretty safe in backing it.
I received mine in the first shipment and have had a chance to put it to the test, and I have to say overall I'm very happy with the money I spent on it. It's not a perfect tool kit, but aiming for the moon and landing in the stars is still something to boast about.
First, let's look at what comes in the package. We'll be talking about the (currently on Silca's website) $98.00 kit. The ratchet can be bought separately, but I think you are missing out if you don't get the torque wrench as well.
Included is the fancy canvas/nylon carrying case (something that's always appreciated to help keep up with things on the go) The T-Ratchet itself (which is actually 3 separate pieces that come together like Voltron to form what you need at the moment) the Ti-Torque extension, and 10 hardened steel bits (2,2.5,3,4,5,6 MM hex heads, a #2 Phillips, and T10, T20 and T25 Torx heads)
So, let's talk about the good, the bad and the ugly.
The Good
There is a lot of good in this package. As with all of Silca's recent offerings, there is a blend of utilitarian, well made parts mixed with a healthy dose of opulence. The ratchet itself is one of the nicest ratchets, mini or otherwise that I have ever used. With a 72t mech, it feels exactly like what it is, a well made high end ratchet. It functions equally well as a T-handle or as an extended wrench, the magnets hold each piece together firmly, and you are left confident that it's not just going to fall apart as soon as you take your hand off of it.
The hardened steel bits are obviously high quality. There are few things worse to a mechanic than feeling the head of a cheap bit rounding off. If these bits are anything close to how the HX-one was built, then I feel confident that they will last a very long time. I normally use WIHA bits for my torque wrenches, and while if you put a gun to my head I'd probably give a slight nod to the German's (made in Germany so you know it's good) I think these bits are very close. Being close to what I think is the best (and full disclosure, a 5-7 piece WIHA bit set costs about 1/3 of what this whole package does) is very, very good. The red band that runs across all the bits is something that wasn't necessary, but is quite striking. It's also something you will be thankful for the first time you drop a bit onto your similarly colored garage floor.
The carry case is nice and durable. It looks classic, in the red and black style the Silca has been sporting recently. In my mind there are only a couple of things I ask of my carry case. I want it to be compact, which this case does well. I want it to securely hold what I'm storing in it, which the Silca case takes to almost an extreme (you won't accidentally pull an extra piece out when you reach for something.) and finally I want it to be durable. Choosing black to make up the primary color is a smart move, since greasy hands are often going to be fumbling around opening it. The canvas/nylon combo feels sturdy and the stitching is heavy. Even the small magnets are powerful enough to convince me it's not going to start flopping around if I hit a bump or toss it to a friend.
Finally there is the Ti-Torque. Let me preface it by saying it's not what I WISH it was. That doesn't mean what it is is not excellent, it just means that in Magical Christmasland I would have wanted it slightly different. Getting a torque range from 2-8nm into the small Ti-Torque had to be a challenge, especially if you wanted it to be accurate, and so it a very traditional style of torque wrench in that as you apply pressure to it, it turns around the collar (where there is a small line to measure against the shaft and it's lines of applied torque) until you hit the desired amount. No clicks, no settings, just a reading. Which absolutely gets the job done, but does it with none of the "in your face flash" that stands out on the rest of the kit.
There is something more important than that "flash" though, especially when talking about a torque wrench. One question that is much more important than any other. Is it accurate?
Yes it is.
I was skeptical. Torque wrenches are notorious for being "too good to be true." Trusting one is a matter of care, calibration and vigilance. Having a torque wrench that isn't accurate is far more dangerous than just going by feel to tighten a bolt. So the real test came to pit the Silca against my current "small" torque wrench, the CDI Torqcontrol and also against my larger (recently calibrated) Snap-on 1/4 wrench.
There is a slight bit of art to it. The first couple of times using the Silca I'd guess most people will under tighten. After I warmed up to it and got a little more familiar to where the gauge landed translating to the torque on the bolt (odd numbers mainly) I got much closer. Checking it against the other two torque wrenches I'm confident that either it's quite accurate, or all of my wrenches are mis calibrated together!
The Bad
There isn't a lot of bad to talk about, and pretty much all of it hinges on user error.
That said, the way the Ti-Torque works, there is a healthy amount of room. Hitting the right torque reading falls into 3 distinct categories.
- even numbers
- odd numbers
- fractions
The third one I included, but it's not a fair inclusion really, since I can't think of many bike parts that you'll be needing fractions to get the right rating. (Maybe a seatpost clamp? I think my Speed Concept maxes out at 7.2nm, but I might be wrong. Anyways, not much) That said, trying to hit the right fraction is probably as close as you can get to impossible.
Odd numbers are a little tricky, and get a little trickier depending on just how good your eyesight and lighting is. Measuring between two quite small white lines doesn't leave a lot of room for error, and while I'd argue that most parts can handle a little more than they are rated, it's not something I am thrilled to think about.
Even numbers are easy peasy. Line up the two lines and you are good to go. The only thing that might stand in your way is how close the lines run together, it's definitely good practise to measure twice, turn once!
There is also the small problem (inconvenience really) that turning the torque wrench does obviously move the little indicators. I found myself having to adjust it back to where I could read it more than a couple of times while working on stem bolts. It seems like I was always turning it just out of easy sight right as I was hitting the right numbers. Of course with a ratcheting handle the solution is a twist away, but it is slightly annoying. On the whole, I just wish it could have been an adjustable click type torque wrench. It would have taken all my complaints away and changed this from an outstanding tool to a life changing tool. I understand why it isn't, but I can still wish it was. As it stands, I'll still probably reach for my other torque wrenches when I'm at the house. (Which isn't a fair comparison to a very portable torque wrench, but one I'll make nonetheless)
The Ugly
Nope. Nothing ugly to see here.
Overall thoughts and impressions
I can't stress enough how excellent this kit is. Is it perfect, no... but it's ambitious and it delivers leaps and bounds over what the competition can muster. The closest competitor is the Topeak Nano Torqbar DX. My own personal feelings about Topeak aside, you are looking at ~$70 for their offering, which although does have preset readings, is limited to 4, 5 and 6nm settings. In my mind there is really no comparison there, as you are paying $30 more dollars to have a full range of torque up to 8nm, the bits (the topeak comes with 5 bits of it's own) and the excellent T-Ratchet. (Not to mention the carry case)
I'm not a pro mechanic (by any stretch) but I work on a good number of bikes (my own and my friends) and I generally carry a fairly extensive amount of tools to local races. That said, I never have a torque wrench with me, as it's tough to carry something like the CDI (that's fairly portable) and just throw it in a tool box. The Silca has changed that, now I'll always have a pocket sized torque wrench with me, one I can be confident in the readings. That's a luxury that brings with it some piece of mind for me personally, as now that I've got into track riding changing parts at the venue is much more frequent. The T-Ratchet/Ti-Torque is meant to be a small, easy to take with you kit. That said, I wouldn't (and won't) feel bad using it in the garage frequently. Changing from a regular handle to a T handle on the fly is a nice convenience I'm happy to take advantage of, so I sure wouldn't be shy recommending this to somebody who is looking to pick up a nice "do it all" tool.
At $98 it's certainly not "cheap" but for what you are getting out of the kit it's hard not to call it a deal. A very nice ratchet, an accurate torque wrench extension, high quality bits and a carry case... try pricing that out and then say it's not a deal, especially if you are looking at high quality tools like the Silca is. I love tools, and I really like Silca's recent offerings, so perhaps I'm biased. Or perhaps they are just making excellent products. So yeah, thumbs up!
Thanks so much for reading, I really appreciate it!
- Christopher Morelock
Anyways, let's dig right in.
The T-Ratchet and Ti-Torque were a Kickstarter project (eventually reaching over 1200%) I became aware of shortly after it was announced. I'm not much of a Kickstarter kind of guy honestly, but I felt like this was a tool that should exist, and Silca has a big enough name behind it that I felt pretty safe in backing it.
I received mine in the first shipment and have had a chance to put it to the test, and I have to say overall I'm very happy with the money I spent on it. It's not a perfect tool kit, but aiming for the moon and landing in the stars is still something to boast about.
First, let's look at what comes in the package. We'll be talking about the (currently on Silca's website) $98.00 kit. The ratchet can be bought separately, but I think you are missing out if you don't get the torque wrench as well.
| Everything neatly (and compactly) held in the carry case. |
Included is the fancy canvas/nylon carrying case (something that's always appreciated to help keep up with things on the go) The T-Ratchet itself (which is actually 3 separate pieces that come together like Voltron to form what you need at the moment) the Ti-Torque extension, and 10 hardened steel bits (2,2.5,3,4,5,6 MM hex heads, a #2 Phillips, and T10, T20 and T25 Torx heads)
So, let's talk about the good, the bad and the ugly.
The Good
There is a lot of good in this package. As with all of Silca's recent offerings, there is a blend of utilitarian, well made parts mixed with a healthy dose of opulence. The ratchet itself is one of the nicest ratchets, mini or otherwise that I have ever used. With a 72t mech, it feels exactly like what it is, a well made high end ratchet. It functions equally well as a T-handle or as an extended wrench, the magnets hold each piece together firmly, and you are left confident that it's not just going to fall apart as soon as you take your hand off of it.
| Nurse Ratchet |
| Transformer! (wait I already called it Voltron, dangit how many 80's cartoons will one post take) |
The hardened steel bits are obviously high quality. There are few things worse to a mechanic than feeling the head of a cheap bit rounding off. If these bits are anything close to how the HX-one was built, then I feel confident that they will last a very long time. I normally use WIHA bits for my torque wrenches, and while if you put a gun to my head I'd probably give a slight nod to the German's (made in Germany so you know it's good) I think these bits are very close. Being close to what I think is the best (and full disclosure, a 5-7 piece WIHA bit set costs about 1/3 of what this whole package does) is very, very good. The red band that runs across all the bits is something that wasn't necessary, but is quite striking. It's also something you will be thankful for the first time you drop a bit onto your similarly colored garage floor.
| Bits! |
The carry case is nice and durable. It looks classic, in the red and black style the Silca has been sporting recently. In my mind there are only a couple of things I ask of my carry case. I want it to be compact, which this case does well. I want it to securely hold what I'm storing in it, which the Silca case takes to almost an extreme (you won't accidentally pull an extra piece out when you reach for something.) and finally I want it to be durable. Choosing black to make up the primary color is a smart move, since greasy hands are often going to be fumbling around opening it. The canvas/nylon combo feels sturdy and the stitching is heavy. Even the small magnets are powerful enough to convince me it's not going to start flopping around if I hit a bump or toss it to a friend.
Finally there is the Ti-Torque. Let me preface it by saying it's not what I WISH it was. That doesn't mean what it is is not excellent, it just means that in Magical Christmasland I would have wanted it slightly different. Getting a torque range from 2-8nm into the small Ti-Torque had to be a challenge, especially if you wanted it to be accurate, and so it a very traditional style of torque wrench in that as you apply pressure to it, it turns around the collar (where there is a small line to measure against the shaft and it's lines of applied torque) until you hit the desired amount. No clicks, no settings, just a reading. Which absolutely gets the job done, but does it with none of the "in your face flash" that stands out on the rest of the kit.
| Ti-Torque ready to go! |
There is something more important than that "flash" though, especially when talking about a torque wrench. One question that is much more important than any other. Is it accurate?
Yes it is.
I was skeptical. Torque wrenches are notorious for being "too good to be true." Trusting one is a matter of care, calibration and vigilance. Having a torque wrench that isn't accurate is far more dangerous than just going by feel to tighten a bolt. So the real test came to pit the Silca against my current "small" torque wrench, the CDI Torqcontrol and also against my larger (recently calibrated) Snap-on 1/4 wrench.
| Who can you trust? |
There is a slight bit of art to it. The first couple of times using the Silca I'd guess most people will under tighten. After I warmed up to it and got a little more familiar to where the gauge landed translating to the torque on the bolt (odd numbers mainly) I got much closer. Checking it against the other two torque wrenches I'm confident that either it's quite accurate, or all of my wrenches are mis calibrated together!
| Torque wrench in action |
The Bad
There isn't a lot of bad to talk about, and pretty much all of it hinges on user error.
That said, the way the Ti-Torque works, there is a healthy amount of room. Hitting the right torque reading falls into 3 distinct categories.
- even numbers
- odd numbers
- fractions
The third one I included, but it's not a fair inclusion really, since I can't think of many bike parts that you'll be needing fractions to get the right rating. (Maybe a seatpost clamp? I think my Speed Concept maxes out at 7.2nm, but I might be wrong. Anyways, not much) That said, trying to hit the right fraction is probably as close as you can get to impossible.
Odd numbers are a little tricky, and get a little trickier depending on just how good your eyesight and lighting is. Measuring between two quite small white lines doesn't leave a lot of room for error, and while I'd argue that most parts can handle a little more than they are rated, it's not something I am thrilled to think about.
Even numbers are easy peasy. Line up the two lines and you are good to go. The only thing that might stand in your way is how close the lines run together, it's definitely good practise to measure twice, turn once!
| trying to demonstrate the room for operator error |
There is also the small problem (inconvenience really) that turning the torque wrench does obviously move the little indicators. I found myself having to adjust it back to where I could read it more than a couple of times while working on stem bolts. It seems like I was always turning it just out of easy sight right as I was hitting the right numbers. Of course with a ratcheting handle the solution is a twist away, but it is slightly annoying. On the whole, I just wish it could have been an adjustable click type torque wrench. It would have taken all my complaints away and changed this from an outstanding tool to a life changing tool. I understand why it isn't, but I can still wish it was. As it stands, I'll still probably reach for my other torque wrenches when I'm at the house. (Which isn't a fair comparison to a very portable torque wrench, but one I'll make nonetheless)
Nope. Nothing ugly to see here.
Overall thoughts and impressions
I can't stress enough how excellent this kit is. Is it perfect, no... but it's ambitious and it delivers leaps and bounds over what the competition can muster. The closest competitor is the Topeak Nano Torqbar DX. My own personal feelings about Topeak aside, you are looking at ~$70 for their offering, which although does have preset readings, is limited to 4, 5 and 6nm settings. In my mind there is really no comparison there, as you are paying $30 more dollars to have a full range of torque up to 8nm, the bits (the topeak comes with 5 bits of it's own) and the excellent T-Ratchet. (Not to mention the carry case)
| T Handle setup |
| "normal" setup |
| Another view, with the extender |
| Extra length! |
I'm not a pro mechanic (by any stretch) but I work on a good number of bikes (my own and my friends) and I generally carry a fairly extensive amount of tools to local races. That said, I never have a torque wrench with me, as it's tough to carry something like the CDI (that's fairly portable) and just throw it in a tool box. The Silca has changed that, now I'll always have a pocket sized torque wrench with me, one I can be confident in the readings. That's a luxury that brings with it some piece of mind for me personally, as now that I've got into track riding changing parts at the venue is much more frequent. The T-Ratchet/Ti-Torque is meant to be a small, easy to take with you kit. That said, I wouldn't (and won't) feel bad using it in the garage frequently. Changing from a regular handle to a T handle on the fly is a nice convenience I'm happy to take advantage of, so I sure wouldn't be shy recommending this to somebody who is looking to pick up a nice "do it all" tool.
At $98 it's certainly not "cheap" but for what you are getting out of the kit it's hard not to call it a deal. A very nice ratchet, an accurate torque wrench extension, high quality bits and a carry case... try pricing that out and then say it's not a deal, especially if you are looking at high quality tools like the Silca is. I love tools, and I really like Silca's recent offerings, so perhaps I'm biased. Or perhaps they are just making excellent products. So yeah, thumbs up!
Thanks so much for reading, I really appreciate it!
- Christopher Morelock
Wednesday, September 14, 2016
Review: Silca SuperPista
Tools fill and odd spot in my life. It's no secret that I'm a gear nerd, and that is something that doesn't stop at one aspect of my life. Tools are something to cherish, to collect, to be proud of, but most importantly, they are things to be used.
And of those tools, there is only one in my garage that literally gets used every single day. The floor pump.
It was soon into wrenching my own (and my friends) bikes that I understood that not only did I need the tools to do the job, but I needed the tools to last more than one or two times being turned. I believe there is a time to skimp on tools (A $300+ pair of ferrule crimpers or a $200 Hanger Alignment tool might be a little more than most home mechanics, myself included, really needs.) there are also some tools that are so commonly used and vital that you should really spend the money to get a nice, heavy duty set. I'm thinking of things like allen wrenches, tire levers, a nice mechanic stand, a torque wrench... things that get used day in and day out.
And of those tools, there is only one in my garage that literally gets used every single day. The floor pump.
| not quite the "ultimate" pump, but pretty dang close. |
I've had a couple of pumps over the years. Some have been great, some have been pretty much garbage, and price has not been the determining factor. I have thrown away a very nice expensive Topeak Joe Blow that was an absolute nightmare to own, and I still have a humble Blackburn from Target that I bought one night on vacation... one I still use pretty commonly (after some modification) and has long surpassed what I expected out of it. I've used quite a few Bontragers, some Specialized, and a Lezyne, all of which were perfectly acceptable. My favorite of those however, has been my Silca Superpista. It's from the mid 2000's, a time when most people would say Silca was slipping, and in a couple of ways it shows in the pump (the small plastic base is not quite a thing of beauty.) and nonetheless, it would be difficult to compare the build quality of any of the other pumps to it.
| The imposing figure cut by the Superpista |
That said, when Josh Poertner (was Joshatzipp now Joshatsilca) started churning out the Ultimate Pumps, I was torn between an unbelievable amount of pump lust and, like most people I believe, a bit of sticker shock. Some time later, a more accessible option was finally released... the return of the Superpista! I went back and forth about getting one (I also continually watched ebay and the forums for a "gently used" Ultimate that might get sold at deep discount, but alas) or not, but eventually took the plunge when Silca sold off their magazine samples! I was lucky enough to get one, and now that I've had a little time to play with it... all that comes to mind is...awesome.
So, let's dive right in and take a look at this thing... what it claims, what it does, what I like and what I don't like.
The good
There are very few higher compliments to give a pump than that it works. Flawlessly and predictably, every single time you use it. Silca has a history of making reliable, easily serviceable pumps that, in many cases are still seeing daily use many, many years since being new. Serviceable at first seems to raise a lot of eyebrows... "at that price, the thing better not ever need service!" is a constant first reaction, but let's be realistic, even million dollar hypercars need serviced eventually. The fact that all pieces of this pump are easily secured and replaced (along with the limited lifetime warranty) means that you won't feel like you have to secure this pump in bubble wrap just to take it to the local race.
If you've never used the little bell shaped presta head chuck that Silca is often associated with, well you are in for a real treat. The push on - push off design takes just a little getting used to, but once you get the hang of it there is really nothing else that transfers air to the valve as efficiently. Of course the valve head is not exclusive to the Superpista, but it's worth getting it's own mention just because it's lovely to have on board. There is also a handy pressure relief valve that is worth having a mention, as it lets you really dial in your psi to exactly what you want. There are plenty of pumps that have this feature, but few have it "on hand" at the valve and none that I know of work with similar accuracy.
The stroke is enormous on this pump. At first this somewhat threw me off, as I have years of muscle memory using a pump with a much shorter shaft. Once I took a step back and started using the entirety of the motion, the pump really showed off just how smooth and efficient it was at getting high pressure in a tube fast. My wife (who scoffed when I first brought home a $200+ pump) came into the living room after using the pump for the first time and said "I can see why this pump cost that much." It takes a lot to impress my wife, she's very "this is all you need" so for her to immediately warm up to it says a lot (It also sits suspiciously close to her cross bike at all time now...)
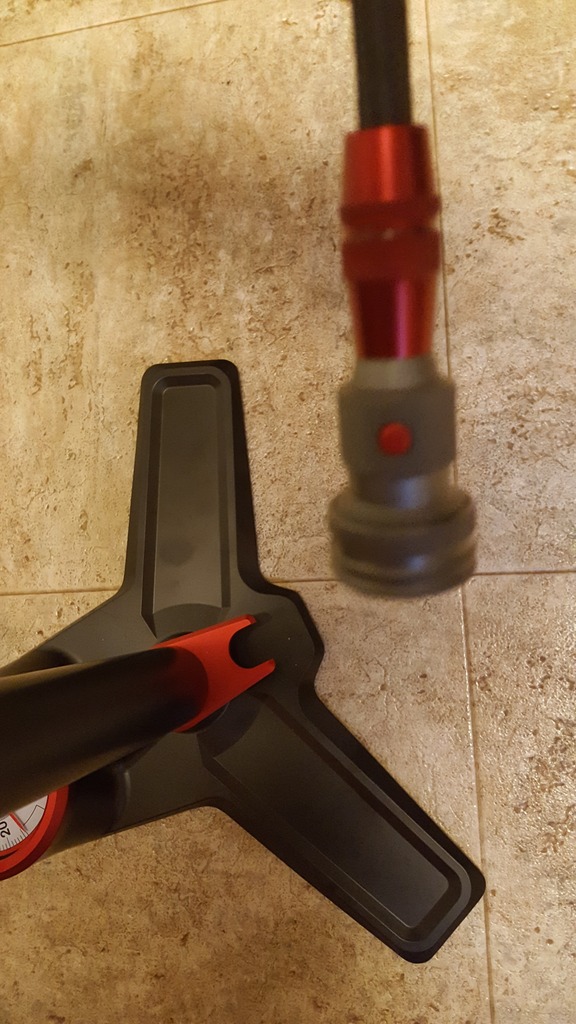
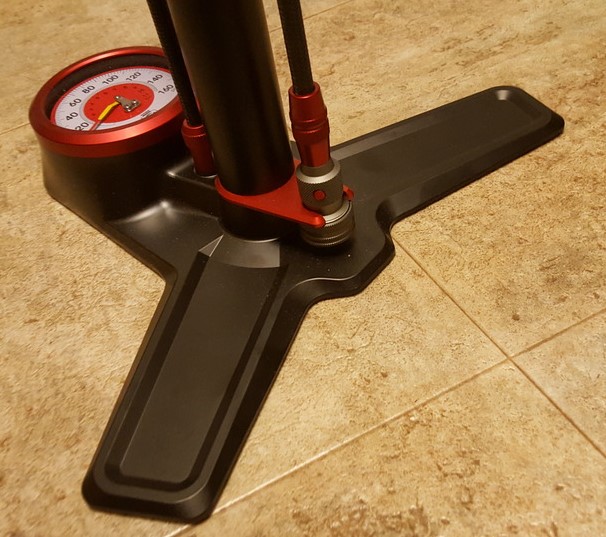
Of all the things I like about this pump (and there are so many) my favorite is indeed the base. So many pumps cut corners on the humble base, whether for monetary reasons or for space considerations, and it often means I'm slinging the pump around awkwardly as opposed to putting all my momentum into the stroke. The Superpista is not going anywhere, on pretty much any surface. I keep using the words predictable and assured... and again I mean it as the highest compliment.
The bad
Is there bad? While I really love this pump, there is one small thing that I wish was at least an option to be made differently on the Superpista. I really, really wish the base of the hose and the lock ring for the end of the presta valve positions could be swapped. I definitely understand why it is made the way it is, (it looks much cleaner for one thing) but for some reason almost every single time I go to use the pump I try to either pull the hose off from the wrong side, or set the gauge facing me backwards. Most pumps have the hose wrap around the shaft, (and secure it at the top of the shaft) and while it looks a little odd it is how it has been ingrained in my mind that pumps work.
That's a pretty small gripe truth be told, and one I wouldn't even mention but for the fact that I had a nice "good/bad/ugly" format set up for this review and needed to fill the bad section with something!
Theugly beautiful
So, let's dive right in and take a look at this thing... what it claims, what it does, what I like and what I don't like.
The good
There are very few higher compliments to give a pump than that it works. Flawlessly and predictably, every single time you use it. Silca has a history of making reliable, easily serviceable pumps that, in many cases are still seeing daily use many, many years since being new. Serviceable at first seems to raise a lot of eyebrows... "at that price, the thing better not ever need service!" is a constant first reaction, but let's be realistic, even million dollar hypercars need serviced eventually. The fact that all pieces of this pump are easily secured and replaced (along with the limited lifetime warranty) means that you won't feel like you have to secure this pump in bubble wrap just to take it to the local race.
If you've never used the little bell shaped presta head chuck that Silca is often associated with, well you are in for a real treat. The push on - push off design takes just a little getting used to, but once you get the hang of it there is really nothing else that transfers air to the valve as efficiently. Of course the valve head is not exclusive to the Superpista, but it's worth getting it's own mention just because it's lovely to have on board. There is also a handy pressure relief valve that is worth having a mention, as it lets you really dial in your psi to exactly what you want. There are plenty of pumps that have this feature, but few have it "on hand" at the valve and none that I know of work with similar accuracy.
| presta bell! Make it a combo with a chili cheese burrito! |
The stroke is enormous on this pump. At first this somewhat threw me off, as I have years of muscle memory using a pump with a much shorter shaft. Once I took a step back and started using the entirety of the motion, the pump really showed off just how smooth and efficient it was at getting high pressure in a tube fast. My wife (who scoffed when I first brought home a $200+ pump) came into the living room after using the pump for the first time and said "I can see why this pump cost that much." It takes a lot to impress my wife, she's very "this is all you need" so for her to immediately warm up to it says a lot (It also sits suspiciously close to her cross bike at all time now...)
Of all the things I like about this pump (and there are so many) my favorite is indeed the base. So many pumps cut corners on the humble base, whether for monetary reasons or for space considerations, and it often means I'm slinging the pump around awkwardly as opposed to putting all my momentum into the stroke. The Superpista is not going anywhere, on pretty much any surface. I keep using the words predictable and assured... and again I mean it as the highest compliment.
| Wide and stable, just what you want |
| The underside |
The bad
Is there bad? While I really love this pump, there is one small thing that I wish was at least an option to be made differently on the Superpista. I really, really wish the base of the hose and the lock ring for the end of the presta valve positions could be swapped. I definitely understand why it is made the way it is, (it looks much cleaner for one thing) but for some reason almost every single time I go to use the pump I try to either pull the hose off from the wrong side, or set the gauge facing me backwards. Most pumps have the hose wrap around the shaft, (and secure it at the top of the shaft) and while it looks a little odd it is how it has been ingrained in my mind that pumps work.
That's a pretty small gripe truth be told, and one I wouldn't even mention but for the fact that I had a nice "good/bad/ugly" format set up for this review and needed to fill the bad section with something!
The
Let's be honest, while you may find some things not to love about this pump (maybe) one thing I doubt anyone can say is that it's ugly. The large, imposing black silhouette that the Superpista casts is perfectly accented with just enough red to make it grab the eye of anyone that wanders by it. The large white face, while intended to make reading pressure easier, does an equally impressive job of conjuring images of a race cars white face gauge cluster. The pumps handle only needed to be functional to pass snuff, but the black kiln beach wood handle that was used adds a very understated bit of class to the otherwise overwhelming "murdered out" vibe that you get looking at it.
Closing thoughts
Let's be realistic. This isn't a pump that most people need. You can find a perfectly functioning tire pump at a much less shocking sticker price. And if that is so, why spend your time considering the Superpista? Certainly I could tell you about the differences in % accuracy (2% as opposed to the normal 5%) or the performance increase (less strokes overall to reach desired psi) and while those things are indeed selling points for some people, in general they are tack on to the real reason to consider it. Because of it's craftsmanship, it's reliability and it's beauty. For those who look at a Timex next to an Omega and say "they both tell time" then no, this probably isn't the pump for you. For those who appreciate it as a FUNCTIONAL work of art, well... look no further. The same could be said for the Ultimate as well... but, well... we all have our limits ;) Convincing my wife a $400+ pump was necessary might take a little time!
![]() |
| Easy to read and gets you in the mind of going fast! |
| It's unfortunate my cameraman skills can't convey the beauty of the handle here. |
Closing thoughts
Let's be realistic. This isn't a pump that most people need. You can find a perfectly functioning tire pump at a much less shocking sticker price. And if that is so, why spend your time considering the Superpista? Certainly I could tell you about the differences in % accuracy (2% as opposed to the normal 5%) or the performance increase (less strokes overall to reach desired psi) and while those things are indeed selling points for some people, in general they are tack on to the real reason to consider it. Because of it's craftsmanship, it's reliability and it's beauty. For those who look at a Timex next to an Omega and say "they both tell time" then no, this probably isn't the pump for you. For those who appreciate it as a FUNCTIONAL work of art, well... look no further. The same could be said for the Ultimate as well... but, well... we all have our limits ;) Convincing my wife a $400+ pump was necessary might take a little time!
Thanks so much for reading... I really appreciate it!
- Christopher Morelock
Wednesday, April 27, 2016
Paddleboard Review! Aqua Marine SPK-1 and SPK-2
For those of you who just stumbled on this looking for the board review, here's your disclaimer. I'm not much of a paddleboarder, novice at the best. So if you are looking for a die hard's review, this isn't it. If you're like I(we) were and looking to get your feet wet (literally) without taking a huge plunge (you see how cheesy this blog is already, right?) then you've come to the right place.
Well ladies and gentlemen, every now and then it's time to branch out and try something new. In my case, I had the wife's help in picking my new interest... ever since she worked at our local bike/outdoors shop she has wanted to do some paddleboarding. Now I've done a very limited amount in the past, and it struck me as a good activity we could enjoy together, as well as a welcome "active" break from training. All that was left was to buy an entry level and enjoy it!
Then I started pricing boards.
Now I think it's fair to say I'm not exactly a cheapskate, but let's be real... like most beginner cyclists / triathletes I had a fairly serious case of sticker shock when I realized exactly how much an entry level board was going to be, to say nothing of the required accessories (have to get it there somehow) that have to be tacked on. A "real" board is going to set you back around a grand, give or take. On vacation a few years ago I saw someone with an inflatable who seemed to be paddling just fine and, due to my Xterra Westuit emails, knew that they made an inflatable board that was considerably cheaper, so I started looking for the reviews.
Unfortunately, the reviews I found were not of high praise. "Cheaply made" and "Terrible Customer Service" are not phrases I like to see in my reviews. I also saw more than one site mention that many of the 4-5 star ratings on sites were "bot" reviews to pad the numbers. I don't know if that's true or not, but it seemed odd to see it mentioned multiple times. All in all, at $600 I felt like I would rather just pony up and spend a little extra on a beachboy or a holo which get solid reviews. Still, I really wanted to try to get two boards for around that price, as the idea was to do this together with the wife.
Enter the Aqua Marine SPK-1. I found this thing wandering through Amazon reviews and...well... it had the best (albeit not a lot) of all of them. Also, since I started my hunt for Black Friday (it was going to be my Christmas gift to the missus.) it was cut down at a pretty hefty discount. I also saw the SPK-2 (which is a little bigger) and, unable to determine the advantages of one over the other, decided to buy one of each. My total from Amazon was $592.90, less than a single Xterra board. Now while that was a special deal, I have looked around and still see these boards selling regularly in the mid $300s, I'd think finding them cheaper again would take a little work but would certainly be possible.
So, after it finally warming up and us having had some time to use them, it's time for a (fairly initial) review.
What you get
To start with, your package comes with the board itself, a bag to lug it around, a pump to inflate it, bungees, a paddle, and a "flat kit" of sorts. (and the fins of course) That's a pretty decent haul for the money. The bag is not overly rugged looking (or feeling) but should certainly do the job so long as you aren't taking into "the bush" regularly. The pump is serviceable, although I'll go into detail about it further down. The paddle is also acceptable for a beginner, although you will want to avoid trying a "real" paddle until you are ready to buy one, as going back will emphasize it's weakness. The fins, despite being seen as the problem area in the reviews, have so far held up surprisingly well in my opinion. (although I pay a little extra attention to them after seeing it was a possible issue) Fortunately I've not had to use the repair kit, (fingers crossed) but it looks like pretty standard fare, and more than I expected. The package also has instructions included, which I suggest at least glancing at (fins in before you inflate is important) although the pictures in the pamphlet are useless.
The Good
Lets start with the very good. The board itself. Once inflated, this thing is rock solid. Even in the ocean with fairly rough waters both boards were confidence inspiring in the construction. At no point in using the SPK boards has "cheap" entered my mind as a way to describe them. Even inflated, the board is pretty light as well, light enough for my wife to lug it around (although she had...well, we both had... some trouble carrying it when it was windy at the ocean and keeping it under control) but heavy enough that it certainly isn't going anywhere without you noticing. Another great thing about this setup is how little room it takes up. The bag with everything in it is roughly the size of a medium/large suitcase. We were able to get both in a new Ford Explorer with 4 peoples week long luggage. (and we didn't skimp on the packing in my opinion) That's pretty compact for a 10ft and 11 ft board. Another thing that should definitely be praised is the ease of getting the thing deflated and packed back up. I admit, when I saw it I thought to myself "no way that thing will fold back up after it's been aired up." Well, I was happily wrong about that. It takes me about 3-5 minutes to get all the air out of the board and it folded back up compactly enough to go in the bag. (the way it's supposed to) That was a very welcome surprise as I've had a few inflatable products that just never seem to fit back in their box/bag again after being used.
The Bad
Unfortunately it's not all sunshine and roses, there are some negatives. First, the most glaring one... the pump. Now it certainly doesn't take a genius to know that in a budget anything there are going to be corners cut somewhere. The Aqua Marine's are no exception and it's quite easy to see where the cuts were made. It isn't that the pump is bad... it actually does a fair job of inflating up to it's limit. Unfortunately, it maxes out at around 14psi, which is a problem because the boards recommend 15psi. You WILL NOT be able to get it pumped up to 15psi with the supplied pump. I've tried multiple times, you will break the pump before you manage it. Getting from 0 to about 13psi takes a couple of minutes and was actually considerably easier than I imagined it would be, but around 13psi you hit a wall. Each pump thereafter requires some serious leverage (standing the pump on a step and pumping from below it helped a little) and after 14psi I was unable to inflate it any further, nor was my wife, both of us together, or my friend Wes who is a beast when it comes to that kind of stuff. Any further attempts and I could feel the pump bending. Now, we've used it multiple times at 14psi with absolutely no issues... but everyone who has been on it has been 150lbs or less. I'm not sure if it is more noticeable at higher loads or not. The simple solution is to buy a more capable pump (or an electric one, although you'd need to make sure to monitor it very carefully then) which sell on Amazon for around $50. Or, you can just live with it being below the recommended psi. Either way, it's a pretty glaring flaw in an otherwise fairly competent package.
The other negative is the paddle. The SPK's come with a collapsing 3 piece paddle, which to it's credit is quite portable and therefore handy when space is key. However, if you ever actually use a "real" paddle, you'll quickly see that this one pales in comparison. It's perfectly serviceable for a beginner though (which I assume you are) and albeit a weak part of the kit, it won't be holding you back for quite some time. Even after upgrading paddles (if you decide to) I'd still keep these around simply because it's handy to have a easy to break down paddle when space is limited.
It's also worth noting that a few reviews mark the fins as being weak. Mine have so far stood up to some abuse, but as I mentioned, I don't drag the board around out of the water on them.
The Ugly
The air release from the boards needs to be done in a fairly controlled manner, otherwise you run the risk of blowing the o-ring that keeps everything nice and sealed. It's not a disaster if that happens (the manual even has detailed instructions on replacing it) but it's a good way to spend your afternoon if you do blow one.
Replacement parts are also fairly hard to come by, although a quick google did bring up replacement fins at ~$25 The hope is that you never need anything, but it's nice to have the piece of mind that if you did you would at least have a shot of finding some.
Final Thoughts
For somebody who wants to test the water (zing!) you can't really go wrong at around $350. There is (in my opinion) some room to upgrade (the pump and paddle specifically) but (so long as you can live with slightly below recommended spec psi) it's not essential to live with the boards straight out of the box. If space is an issue, I don't think you'll find a smaller total package for a 10+ ft board. I came in with fairly low expectations and was pleasantly surprised, and I think so long as you don't buy them thinking you are getting a top of the line board you will be satisfied. If I were to compare them to a bicycle I'd place it in the Sora-equipped aluminum bikes you can buy. It's not a race machine, mountain goat climber or super stiff aero frame, but if you need a bike (or in this case board) to put miles into, it's a solid work horse that will give you a feel for paddleboarding. In the event that you decide to buy a "real" board, the SPKs don't lose all of their value, as I could see them still being ideal for traveling when you don't want to strap a board to the top of your car. So, in my opinion they get a thumbs up for a cheap, enjoyable way to spend an afternoon!
Thanks so much for reading and checking out the blog! I really appreciate it! Next week, maybe back to racing!
- Christopher Morelock
Well ladies and gentlemen, every now and then it's time to branch out and try something new. In my case, I had the wife's help in picking my new interest... ever since she worked at our local bike/outdoors shop she has wanted to do some paddleboarding. Now I've done a very limited amount in the past, and it struck me as a good activity we could enjoy together, as well as a welcome "active" break from training. All that was left was to buy an entry level and enjoy it!
Then I started pricing boards.
Now I think it's fair to say I'm not exactly a cheapskate, but let's be real... like most beginner cyclists / triathletes I had a fairly serious case of sticker shock when I realized exactly how much an entry level board was going to be, to say nothing of the required accessories (have to get it there somehow) that have to be tacked on. A "real" board is going to set you back around a grand, give or take. On vacation a few years ago I saw someone with an inflatable who seemed to be paddling just fine and, due to my Xterra Westuit emails, knew that they made an inflatable board that was considerably cheaper, so I started looking for the reviews.
Unfortunately, the reviews I found were not of high praise. "Cheaply made" and "Terrible Customer Service" are not phrases I like to see in my reviews. I also saw more than one site mention that many of the 4-5 star ratings on sites were "bot" reviews to pad the numbers. I don't know if that's true or not, but it seemed odd to see it mentioned multiple times. All in all, at $600 I felt like I would rather just pony up and spend a little extra on a beachboy or a holo which get solid reviews. Still, I really wanted to try to get two boards for around that price, as the idea was to do this together with the wife.
Enter the Aqua Marine SPK-1. I found this thing wandering through Amazon reviews and...well... it had the best (albeit not a lot) of all of them. Also, since I started my hunt for Black Friday (it was going to be my Christmas gift to the missus.) it was cut down at a pretty hefty discount. I also saw the SPK-2 (which is a little bigger) and, unable to determine the advantages of one over the other, decided to buy one of each. My total from Amazon was $592.90, less than a single Xterra board. Now while that was a special deal, I have looked around and still see these boards selling regularly in the mid $300s, I'd think finding them cheaper again would take a little work but would certainly be possible.
![]() |
| SPK-1 ready for action |
So, after it finally warming up and us having had some time to use them, it's time for a (fairly initial) review.
What you get
To start with, your package comes with the board itself, a bag to lug it around, a pump to inflate it, bungees, a paddle, and a "flat kit" of sorts. (and the fins of course) That's a pretty decent haul for the money. The bag is not overly rugged looking (or feeling) but should certainly do the job so long as you aren't taking into "the bush" regularly. The pump is serviceable, although I'll go into detail about it further down. The paddle is also acceptable for a beginner, although you will want to avoid trying a "real" paddle until you are ready to buy one, as going back will emphasize it's weakness. The fins, despite being seen as the problem area in the reviews, have so far held up surprisingly well in my opinion. (although I pay a little extra attention to them after seeing it was a possible issue) Fortunately I've not had to use the repair kit, (fingers crossed) but it looks like pretty standard fare, and more than I expected. The package also has instructions included, which I suggest at least glancing at (fins in before you inflate is important) although the pictures in the pamphlet are useless.
The Good
Lets start with the very good. The board itself. Once inflated, this thing is rock solid. Even in the ocean with fairly rough waters both boards were confidence inspiring in the construction. At no point in using the SPK boards has "cheap" entered my mind as a way to describe them. Even inflated, the board is pretty light as well, light enough for my wife to lug it around (although she had...well, we both had... some trouble carrying it when it was windy at the ocean and keeping it under control) but heavy enough that it certainly isn't going anywhere without you noticing. Another great thing about this setup is how little room it takes up. The bag with everything in it is roughly the size of a medium/large suitcase. We were able to get both in a new Ford Explorer with 4 peoples week long luggage. (and we didn't skimp on the packing in my opinion) That's pretty compact for a 10ft and 11 ft board. Another thing that should definitely be praised is the ease of getting the thing deflated and packed back up. I admit, when I saw it I thought to myself "no way that thing will fold back up after it's been aired up." Well, I was happily wrong about that. It takes me about 3-5 minutes to get all the air out of the board and it folded back up compactly enough to go in the bag. (the way it's supposed to) That was a very welcome surprise as I've had a few inflatable products that just never seem to fit back in their box/bag again after being used.
| SPK 1&2 bagged and ready to go (all extras inside as well) |
| The SPK-2 rolled up in the bag |
The Bad
Unfortunately it's not all sunshine and roses, there are some negatives. First, the most glaring one... the pump. Now it certainly doesn't take a genius to know that in a budget anything there are going to be corners cut somewhere. The Aqua Marine's are no exception and it's quite easy to see where the cuts were made. It isn't that the pump is bad... it actually does a fair job of inflating up to it's limit. Unfortunately, it maxes out at around 14psi, which is a problem because the boards recommend 15psi. You WILL NOT be able to get it pumped up to 15psi with the supplied pump. I've tried multiple times, you will break the pump before you manage it. Getting from 0 to about 13psi takes a couple of minutes and was actually considerably easier than I imagined it would be, but around 13psi you hit a wall. Each pump thereafter requires some serious leverage (standing the pump on a step and pumping from below it helped a little) and after 14psi I was unable to inflate it any further, nor was my wife, both of us together, or my friend Wes who is a beast when it comes to that kind of stuff. Any further attempts and I could feel the pump bending. Now, we've used it multiple times at 14psi with absolutely no issues... but everyone who has been on it has been 150lbs or less. I'm not sure if it is more noticeable at higher loads or not. The simple solution is to buy a more capable pump (or an electric one, although you'd need to make sure to monitor it very carefully then) which sell on Amazon for around $50. Or, you can just live with it being below the recommended psi. Either way, it's a pretty glaring flaw in an otherwise fairly competent package.
| The pump in all of it's glory. It tries... it really does. |
| The gauge shows 20psi possible, but if you hit 15, send me a picture because you deserve a prize! |
The other negative is the paddle. The SPK's come with a collapsing 3 piece paddle, which to it's credit is quite portable and therefore handy when space is key. However, if you ever actually use a "real" paddle, you'll quickly see that this one pales in comparison. It's perfectly serviceable for a beginner though (which I assume you are) and albeit a weak part of the kit, it won't be holding you back for quite some time. Even after upgrading paddles (if you decide to) I'd still keep these around simply because it's handy to have a easy to break down paddle when space is limited.
| paddle broken down (and bagged) is about 3ft at the longest. One of it's strong upsides. |
It's also worth noting that a few reviews mark the fins as being weak. Mine have so far stood up to some abuse, but as I mentioned, I don't drag the board around out of the water on them.
The Ugly
The air release from the boards needs to be done in a fairly controlled manner, otherwise you run the risk of blowing the o-ring that keeps everything nice and sealed. It's not a disaster if that happens (the manual even has detailed instructions on replacing it) but it's a good way to spend your afternoon if you do blow one.
Replacement parts are also fairly hard to come by, although a quick google did bring up replacement fins at ~$25 The hope is that you never need anything, but it's nice to have the piece of mind that if you did you would at least have a shot of finding some.
Final Thoughts
For somebody who wants to test the water (zing!) you can't really go wrong at around $350. There is (in my opinion) some room to upgrade (the pump and paddle specifically) but (so long as you can live with slightly below recommended spec psi) it's not essential to live with the boards straight out of the box. If space is an issue, I don't think you'll find a smaller total package for a 10+ ft board. I came in with fairly low expectations and was pleasantly surprised, and I think so long as you don't buy them thinking you are getting a top of the line board you will be satisfied. If I were to compare them to a bicycle I'd place it in the Sora-equipped aluminum bikes you can buy. It's not a race machine, mountain goat climber or super stiff aero frame, but if you need a bike (or in this case board) to put miles into, it's a solid work horse that will give you a feel for paddleboarding. In the event that you decide to buy a "real" board, the SPKs don't lose all of their value, as I could see them still being ideal for traveling when you don't want to strap a board to the top of your car. So, in my opinion they get a thumbs up for a cheap, enjoyable way to spend an afternoon!
![]() |
| Don't hate, it's a cool picture... I'll reuse it all I want... |
Thanks so much for reading and checking out the blog! I really appreciate it! Next week, maybe back to racing!
- Christopher Morelock
Subscribe to:
Posts (Atom)